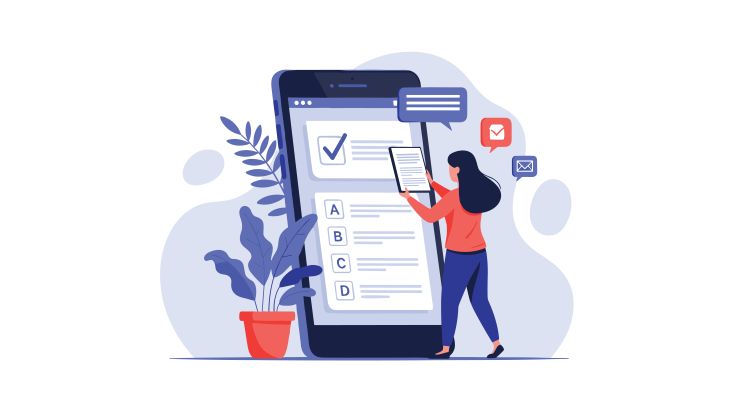
We’re pleased to share that the first phase of the Grades Journey Project is nearing completion.
Grades Journey allows marks entered in the Blackboard Gradebook to be transferred directly into SITS in just a few clicks. Previously, grades had to be entered separately in both Blackboard and SITS, requiring the same information to be recorded twice. Grades Journey removes this duplication, streamlining the process and reducing the time it takes to finalise grades, particularly for modules with large cohorts. It also helps improve accuracy, as grades only need to be entered once.
This was one of the most requested features during the Blackboard Ultra upgrade, and we’re pleased to be delivering it as part of our ongoing work to improve the assessment process.
The results from the first phase of the project have been very encouraging. Staff who took part found the process quick and straightforward, and their feedback has helped us refine both the workflow and the supporting training materials.
Over the coming months, we’ll be running further small-group trials as we prepare for a wider rollout in Semester 1.
If you’d like to find out more about the Grades Journey Project, or volunteer to take part in the next trial phase, we’d love to hear from you. Please contact us at tel@worc.ac.uk.
Rather than uploading your files directly to Blackboard, you may want to consider using the ‘Convert a file’ option:
Select Create, Document, then ‘Convert a file’
Browse for your files on your PC.
Once selected, the system converts the file into the Document format.
Supported file types include PDF (.pdf), PowerPoint (.ppt, .pptx, .pps), or Word (.doc, .docx, .odt).
Converted content should be reviewed for accuracy
Why use a Blackboard Document?
Blackboard documents are more accessible than uploading files because they are designed as native, responsive web pages (rather than attachments). The documents will also use a more standardised font style, so provide consistency across your Blackboard module.
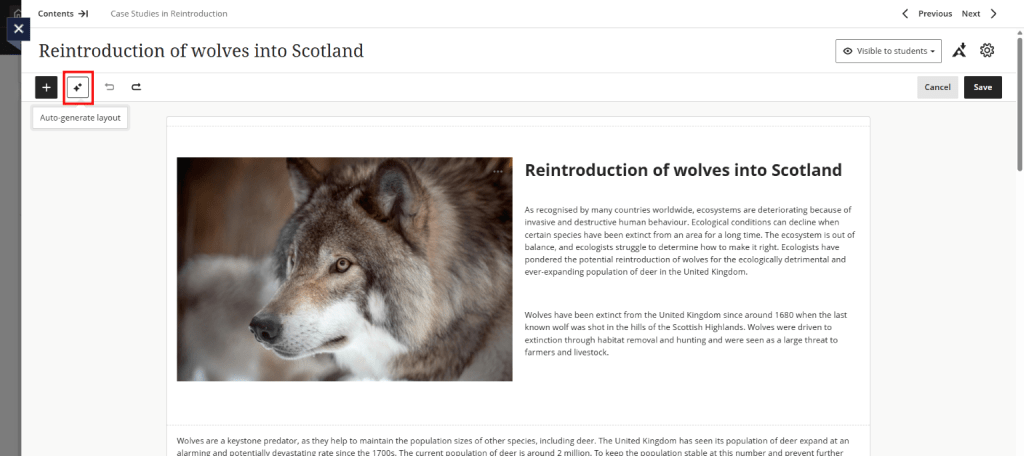
In a document that already has content, select the auto-generate icon (shown in red above). This optimises the layout, reorganises text or image content, and optionally creates a knowledge check.
Select the Auto-generate layout icon.
Review the layout and adjust as needed.
You can select Settings and update options, such as, which images are included, or if a knowledge check is needed.
The TEL Unit have put together some tips and advice for students who wish to obtain copies of their work and feedback from tutors.
Staff are welcome to share this information with their students.
Guidance for Students – Downloading Assessments
While you are a current University of Worcester student, any assignments which you have uploaded to the Blackboard VLE or Turnitin can be downloaded at any point for your own records.
This is particularly important if you are a student who is finishing your course:
We recommend storing any copies of your work securely – outside of the Blackboard VLE or your Microsoft student account. You will need to use personal file storage options instead after leaving the University.
You may wish to keep a back-up copy for the future too. For example, if your device should have any issues.
Turnitin Assignments
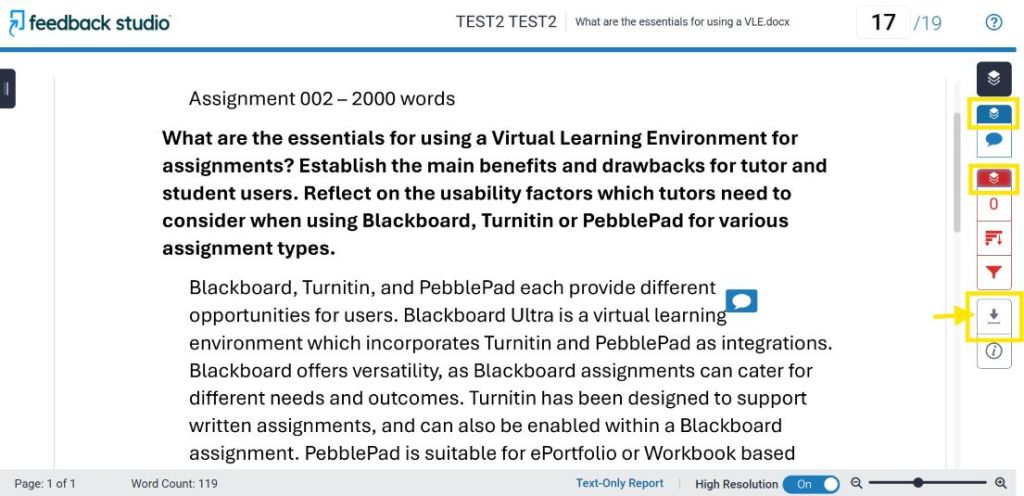
Access uploaded work through a Turnitin submission link in Blackboard. You can select your assignment title to review your work.
Once you have opened your assignment, ensure you have the feedback and similarity layers activated. (You can use the blue and red buttons on the right.)
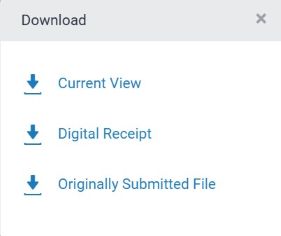
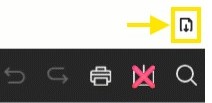
Then click the grey download arrow to show the different options to select:
Current View
This will download as a .pdf file document
Digital Receipt
Shows the time and date of submission
Originally Submitted File
Your work as you uploaded it
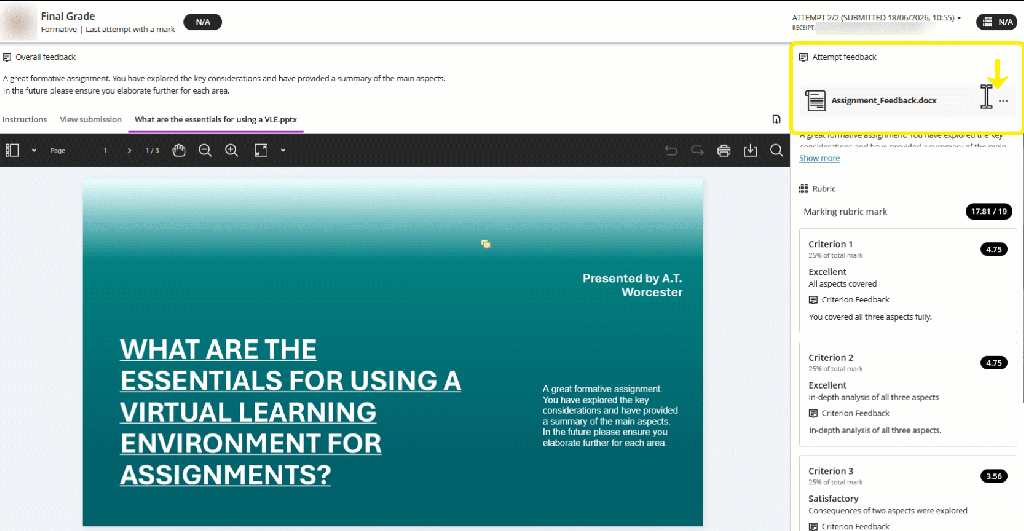
We recommend choosing to download the Current View with layers showing, if you would like a copy of your assignment, similarity matches, grade, and feedback.
The downloaded ‘Current View’ .pdf file will contain:
Submission details
Your Assignment
Originality Report (Similarity checks)
GradeMark Report (Grade and Feedback comments)
Your feedback and grade can be found at the end of the .pdf document:
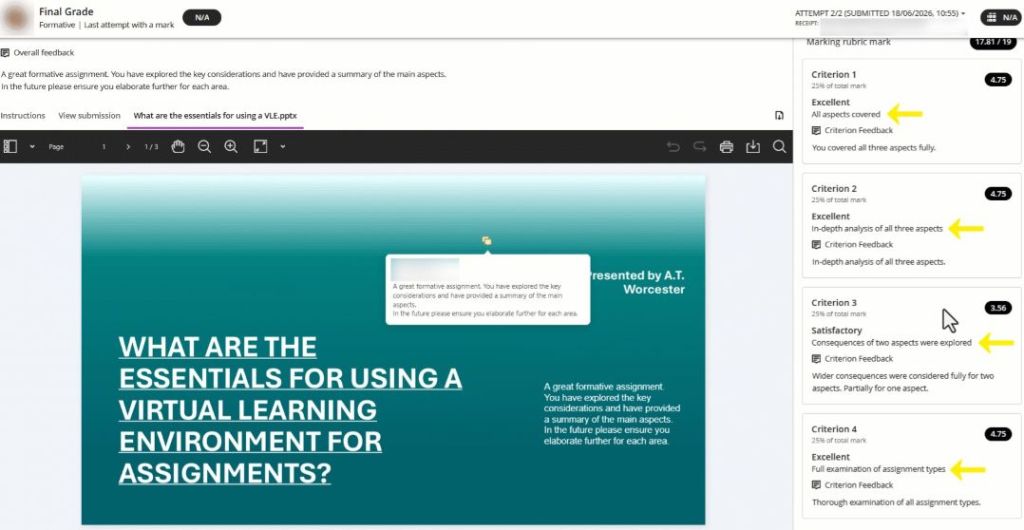
Within your Assignment / the on screen document view:
Document Annotations and Comments
Comments can show as a Speech Bubble / Callout
Or as typed text
4a and 4b- Comments / annotations are included in a .pdf download of your work. Clicking on / hovering over the speech bubble reveals comments. You can select the large download arrow in the tool bar options to get a .pdf file copy of your work and feedback:
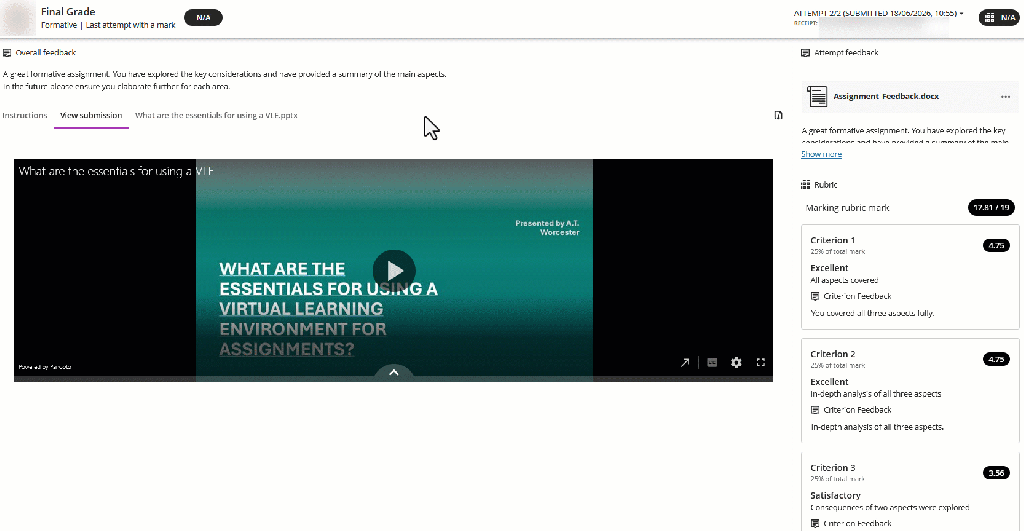
Audio or Video Feedback
Sometimes, tutors may include Feedback Recordings. (It is not possible to download recorded feedback from Blackboard.)
Downloading Blackboard Assignments with Turnitin enabled
For other written feedback, it is not possible to download a copy straight from Blackboard. You could instead copy and paste tutor comments into a new document on your computer. Or take a screenshot for your own records to store outside of the VLE.
Embedded Video Assessments
Embedded video assignments are not stored in Blackboard, so cannot be downloaded from here as they are held in Panopto.
Further support
Please contact your tutors if you cannot see your work or feedback, but please also feel free to contact TEL for technical support: TEL@worc.ac.uk
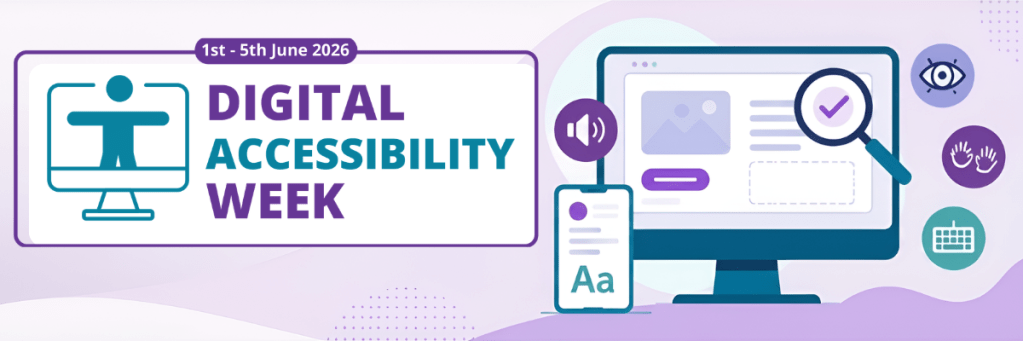
Digital Accessibility Week 2026 has now come to a close, and we’d like to thank everyone who took part.
During the week, colleagues from across the University attended workshops, accessed support sessions, explored practical guidance, and contributed to the Accessibility Challenge. Together, these activities helped improve digital content and learning materials while highlighting how small changes can make a significant difference to the student experience.
Thank You for Getting Involved
A huge thank you to everyone who attended a session, visited a drop-in, explored the guidance resources, or took part in the accessibility challenge.
Accessibility Challenge
One of the highlights of the week was our Accessibility Challenge, which encouraged colleagues to improve the accessibility of documents within Blackboard using Ally guidance and feedback.
We’re delighted to share that 391 accessibility improvements were made during the course of the week.
These improvements represent hundreds of individual changes, from adding heading structures and alternative text to improving document formatting, layout, and readability.
Alongside the 391 accessibility improvements made during the challenge, 205 new accessibility issues were identified, highlighting the ongoing nature of this work. This reinforces an important message: building accessibility into content from the outset is far more effective – and far less time-consuming – than fixing issues later.
The progress made during the week was extremely encouraging, and the commitment shown by colleagues across the University provides a strong foundation for continuing to improve the accessibility of our digital content.
Session Recordings
If you were unable to attend during the week, recordings of several sessions are now available:
Digital Accessibility Week may have finished, but accessibility remains an important part of creating effective and inclusive learning experiences.
If you would like support with improving the accessibility of learning materials, using Blackboard Ally, or adopting accessible approaches to digital content creation, the TEL team is here to help, tel@worc.ac.uk. Please get in touch.
Following a review of tools used for online teaching, the University has agreed to move from Collaborate to Microsoft Teams. This decision was confirmed at LTSEC on 20 May.
Our current contract with Collaborate will end in August 2026, after which Teams will become the University’s primary platform for online teaching from 1 September 2026.
The decision reflects a balanced assessment of several factors. While cost and long-term value were important considerations, it was equally significant that the core teaching functionality offered through Collaborate is now available within Teams. This provides a more integrated, familiar environment for both staff and students, bringing online teaching into the same platform already widely used for collaboration across the University.
It was also recognised that continuing with Collaborate would require a move to a newer version in the near future. This version differs substantially from the current system in terms of features and usability, meaning staff would be adapting to a significantly different platform regardless. Given this, transitioning to Teams now offers a clearer and more consistent direction.
Staff feedback has been a key part of the process. Many colleagues are already confidently using Teams for teaching, and overall sentiment supported the move. Where concerns were raised, such as managing student interactions, these can be addressed through appropriate configuration of Teams to ensure sessions remain structured and manageable.
What does this mean for me?
Staff will need to familiarise themselves with using Teams for teaching ahead of the new academic year. Support will be available to ensure a smooth transition. Digital Services and the Technology Enhanced Learning Unit will provide training, guidance, and resources for both staff and students over the coming months, with further details shared via the staff bulletin, TEL and Digital Services websites, and iTrent.
This change represents a positive step towards a more unified and sustainable digital teaching environment, with the tools, support, and flexibility needed to deliver high-quality online learning.
As we approach our first Digital Accessibility Week(1st – 5th June 2026), it is a great time to review the current accessibility of your digital learning resources. This is particularly important as you prepare to migrate your Blackboard module content for Semester 1. Reviewing your materials now can help you identify and address accessibility issues early.
How to check the accessibility of learning resources?
Blackboard Ally is a valuable tool for identifying accessibility issues within your content and providing guidance on how to improve it.
Many of the issues highlighted by Blackboard Ally can be resolved quickly. Our 5-minute fixes resource offers practical guidance on addressing commonly identified accessibility issues in documents using Blackboard Ally.
Top tips for digital accessibility
The TEL website provides further guidance and resources to support with improving the accessibility of documents and resources. Some key aspects to consider are:
Adding alternative (alt) text to images
Using high colour contrast to ensure text stands out from the background
Structuring content clearly using headings and sections
Keeping slides or documents easy to read by limiting text and using clear, readable font sizes
Using meaningful link text and file names to support navigation
Further support
For more information about the events throughout digital accessibility week, including TEL drop-in sessions, please see the website link below:
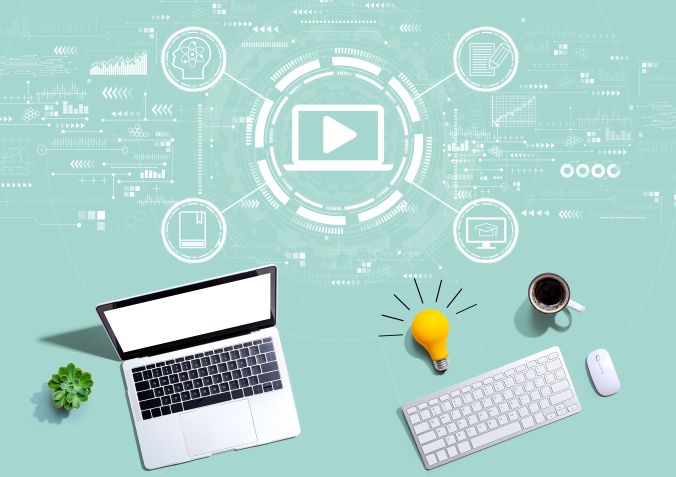
Vevox is an interactive polling and Q&A tool that can help increase engagement in lectures, seminars, online teaching, and asynchronous activities. Students can respond using their phone, tablet, or laptop through live polls, quizzes, surveys, and anonymous questions.
There are three main ways you can use Vevox in your teaching.
1. Standalone Vevox Sessions
Vevox can be used independently through the Vevox website to run live polls, quizzes, or Q&A sessions in face-to-face or online teaching. You simply present the session code or QR code for students to join.
This is useful for:
Checking what students already know at the start of a session.
Gauging understanding during a lecture and adjusting your pace accordingly.
Encouraging participation from students who are reluctant to speak aloud.
Running revision quizzes to support knowledge retention.
Gathering anonymous questions so students can ask without hesitation.
Because it works independently of any other platform, this is often the quickest way to get started.
2. Vevox in Blackboard Ultra
Vevox can be integrated directly into Blackboard Ultra, allowing you to embed polls, surveys, and quizzes within your module areas for students to complete through Blackboard itself.
This is particularly useful for:
Setting asynchronous activities students complete in their own time.
Checking understanding between taught sessions.
Identifying topics students found difficult before the next class.
Formative quizzes that give students low-stakes practice and immediate feedback.
Depending on the activity type, results can connect with Blackboard Gradebook, allowing you to track participation and review scores.
3. Vevox in Microsoft Teams Meetings
Vevox can be added into Microsoft Teams meetings to support live online teaching. Polls and Q&A activities run alongside your presentation without students needing to leave the meeting.
This works well for:
Checking understanding during online lectures without interrupting the flow of teaching.
Identifying misconceptions in real time and addressing them immediately.
Increasing participation in sessions where students may be less likely to speak.
Gathering anonymous questions that allow quieter or less confident students to engage.
Ending sessions with an exit poll to find out what students are taking away — and what might need revisiting.
For setup guidance, examples, and further support, visit the Vevox guidance page
The TEL team is excited to launch Digital Accessibility Week1st-5th June – a week dedicated to improving the accessibility of digital content across the university through practical workshops, drop-in sessions, guidance resources, and a university-wide accessibility challenge.
Digital accessibility is about making sure everyone can access and engage with digital content, including documents, webpages, presentations, and online learning materials. According to the Office for National Statistics, 17.7% of people in England and 21.1% of people in Wales identified as disabled in the 2021 Census. Accessible content helps remove barriers for many users, while also improving usability, readability, and flexibility for everyone.
Workshops, Support and the ‘500 Document Challenge’
Throughout the week, staff will have opportunities to:
Attend practical accessibility workshops
Access one-to-one support at drop-in sessions
Explore quick wins and five-minute fixes
Take part in the 500 Document Challenge to improve the accessibility of learning materials and university documents
As part of the challenge, courses across the university are encouraged to improve the accessibility of documents within Blackboard using Ally accessibility guidance and feedback. Our aim is to improve at least 500 documents to an Ally Accessibility score of 75% or above during the week.
The challenge is also an opportunity for Schools to work collaboratively to improve the accessibility of their learning materials. At the end of the week, certificates will be awarded to the School that achieves the greatest improvement in their overall Ally Accessibility score.
We’ll be sharing practical guidance on topics including:
Heading structures
Alt text
Accessible PDFs
Colour contrast
Accessible formatting and layout
Why Digital Accessibility Matters
Small changes can make a significant difference. Clear headings, accessible documents, captions, and meaningful structure can improve the experience for students and colleagues using assistive technologies, mobile devices, or alternative ways of accessing information.
“The power of the Web is in its universality. Access by everyone regardless of disability is an essential aspect.” — Tim Berners-Lee
Whether you are new to digital accessibility or looking to build on existing practice, Digital Accessibility Week offers practical ways to get involved and make a positive impact across the university community.
Find Out More
You can explore the full programme of events and resources here:
Reference Office for National Statistics (2023). Disability by age, sex and deprivation, England and Wales: Census 2021. Available at: ONS Disability Statistics
Module Rollover for Semester 1 will occur week commencing the 8th June.
In anticipation of the upcoming module rollover date, we would like to let you know that the TEL team are here to help with any queries you may have. Our Learning Technologists are available to discuss how to get the best out of the university’s technological tools, to enhance your pedagogic approaches.
Departmental or Course teams are welcome to contact us at TEL tel@worc.ac.uk to arrange a meeting.
Online support available from TEL
Module Design support
Our Learning Technologists have developed some insightful Module Design guidance for staff:
The Module Designer Tool – This tool can be used to assist with each stage of designing a course. You can also use it for general guidance when creating engaging and easy to use online content.
Our Blackboard Learn Ultra Manual covers everything from creating new content and setting up assessments, to using interactive tools or features which boost student engagement.
Semester 1 Modules are due to be created in Blackboard week commencing 8th June 2026. Modules will be available for staff to self-enrol on from the second week of June to allow time to develop new online course content for next year.
Migrating your Content
Intending to reuse materials from last year?
Once you have self-enrolled onto the newly created modules in June. You can follow our Copying Content guidance to bring across any content from another module you are already enrolled on, you will firstly need to be in the new empty module.
Differences between a ‘Course Copy’ and the recommended ‘Bulk Copy’
Copying an entire course will include all old announcements and assessments. Only use this option if you wish to copy everything on the Content page including Panopto videos that are not held in a learning module or folder.
If you do use the course copy option, we recommend removing any copied assessments and to create new assessments for the current semester / academic year instead.
On the other hand, the Bulk Copy option allows you to select folders using ‘Copy Items’. We recommend copying only the specific items that are needed using the Bulk Copy method. You can also choose to copy individual items at a more granular level.
Copying Videos
Each Blackboard module has a Panopto folder where video content for the module needs to be held. By storing videos in this folder, permissions are granted to all users enrolled onto the Blackboard module to view. If you need to check your module’s videos you can do this by using the Panopto website link. (The Panopto website link is useful for managing your module’s video content, we recommend keeping this hidden from student view.) If you cannot see a video listed in your module’s Panopto folder, you will need to ensure this is copied over. You can choose to upload and embed to Blackboard if any videos are missing. If you have any problems checking on the location of your videos, or ensuring videos are copied over, please do contact us at TEL tel@worc.ac.uk for further support.
A second blog post will follow (Part 2), detailing the different support available from TEL to assist colleagues with preparations for the new academic year. Part 2 is now available:Part 2: TEL Support for Module Rollover 2026
We use cookies on our website to give you the most relevant experience by remembering your preferences and repeat visits. By clicking “Accept All”, you consent to the use of ALL the cookies. However, you may visit "Cookie Settings" to provide a controlled consent.
This website uses cookies to improve your experience while you navigate through the website. Out of these, the cookies that are categorized as necessary are stored on your browser as they are essential for the working of basic functionalities of the website. We also use third-party cookies that help us analyze and understand how you use this website. These cookies will be stored in your browser only with your consent. You also have the option to opt-out of these cookies. But opting out of some of these cookies may affect your browsing experience.
Necessary cookies are absolutely essential for the website to function properly. These cookies ensure basic functionalities and security features of the website, anonymously.
Cookie
Duration
Description
cookielawinfo-checkbox-analytics
6 months
This cookie is set by GDPR Cookie Consent plugin. The cookie is used to store the user consent for the cookies in the category "Analytics".
cookielawinfo-checkbox-functional
6 months
The cookie is set by GDPR cookie consent to record the user consent for the cookies in the category "Functional".
cookielawinfo-checkbox-necessary
6 months
This cookie is set by GDPR Cookie Consent plugin. The cookies is used to store the user consent for the cookies in the category "Necessary".
cookielawinfo-checkbox-others
6 months
This cookie is set by GDPR Cookie Consent plugin. The cookie is used to store the user consent for the cookies in the category "Other.
cookielawinfo-checkbox-performance
6 months
This cookie is set by GDPR Cookie Consent plugin. The cookie is used to store the user consent for the cookies in the category "Performance".
viewed_cookie_policy
6 months
The cookie is set by the GDPR Cookie Consent plugin and is used to store whether or not user has consented to the use of cookies. It does not store any personal data.
Functional cookies help to perform certain functionalities like sharing the content of the website on social media platforms, collect feedbacks, and other third-party features.
Performance cookies are used to understand and analyze the key performance indexes of the website which helps in delivering a better user experience for the visitors.
Analytical cookies are used to understand how visitors interact with the website. These cookies help provide information on metrics the number of visitors, bounce rate, traffic source, etc.
Advertisement cookies are used to provide visitors with relevant ads and marketing campaigns. These cookies track visitors across websites and collect information to provide customized ads.